Tools and Materials:
-Amplifier Wiring Kit (depending on your Amp wattage)
-Amplifier
-Subwoofer Box (if you haven't customized one)
-Subwoofer
-Zip ties
-Screwdriver (drill is preferrably better and easier)
-Stereo removal kit (model specific on the aftermarket stereo you put in)
-Panel popper
-Wrench or socket wrench for removing battery terminals
-Crimping tool
-Wire worm or fish tape
-step drill or multi bit (to be able to run the amplifier wiring through the plastic cover for the clutch assembly-for cars with automatic transmission or to be able to drill through the firewall-for cars with standard transmission which is a little bit harder to do, :) )
Steps I have done to be able to install my amplifier and subwoofer on my 02 Ford Focus:
- Mount the Subwoofer and Amplifier on my Subwoofer Box, don't forget to terminate a short speaker wire from your Subwoofer to the terminal connection for the inside of the Subwoofer box, you can use terminal clips or just solder them, it's your choice.
- Here are some pics of how I mounted my Amp and Sub on the Subwoofer box. I made this choice because I wanted the option of removing my Amp and Sub if I needed more trunk space.


- If you can see this RCA cable, this is just the other end of that RCA cable from my previous project, which is now attached to the Sub Out of the aftermarket stereo I have installed.

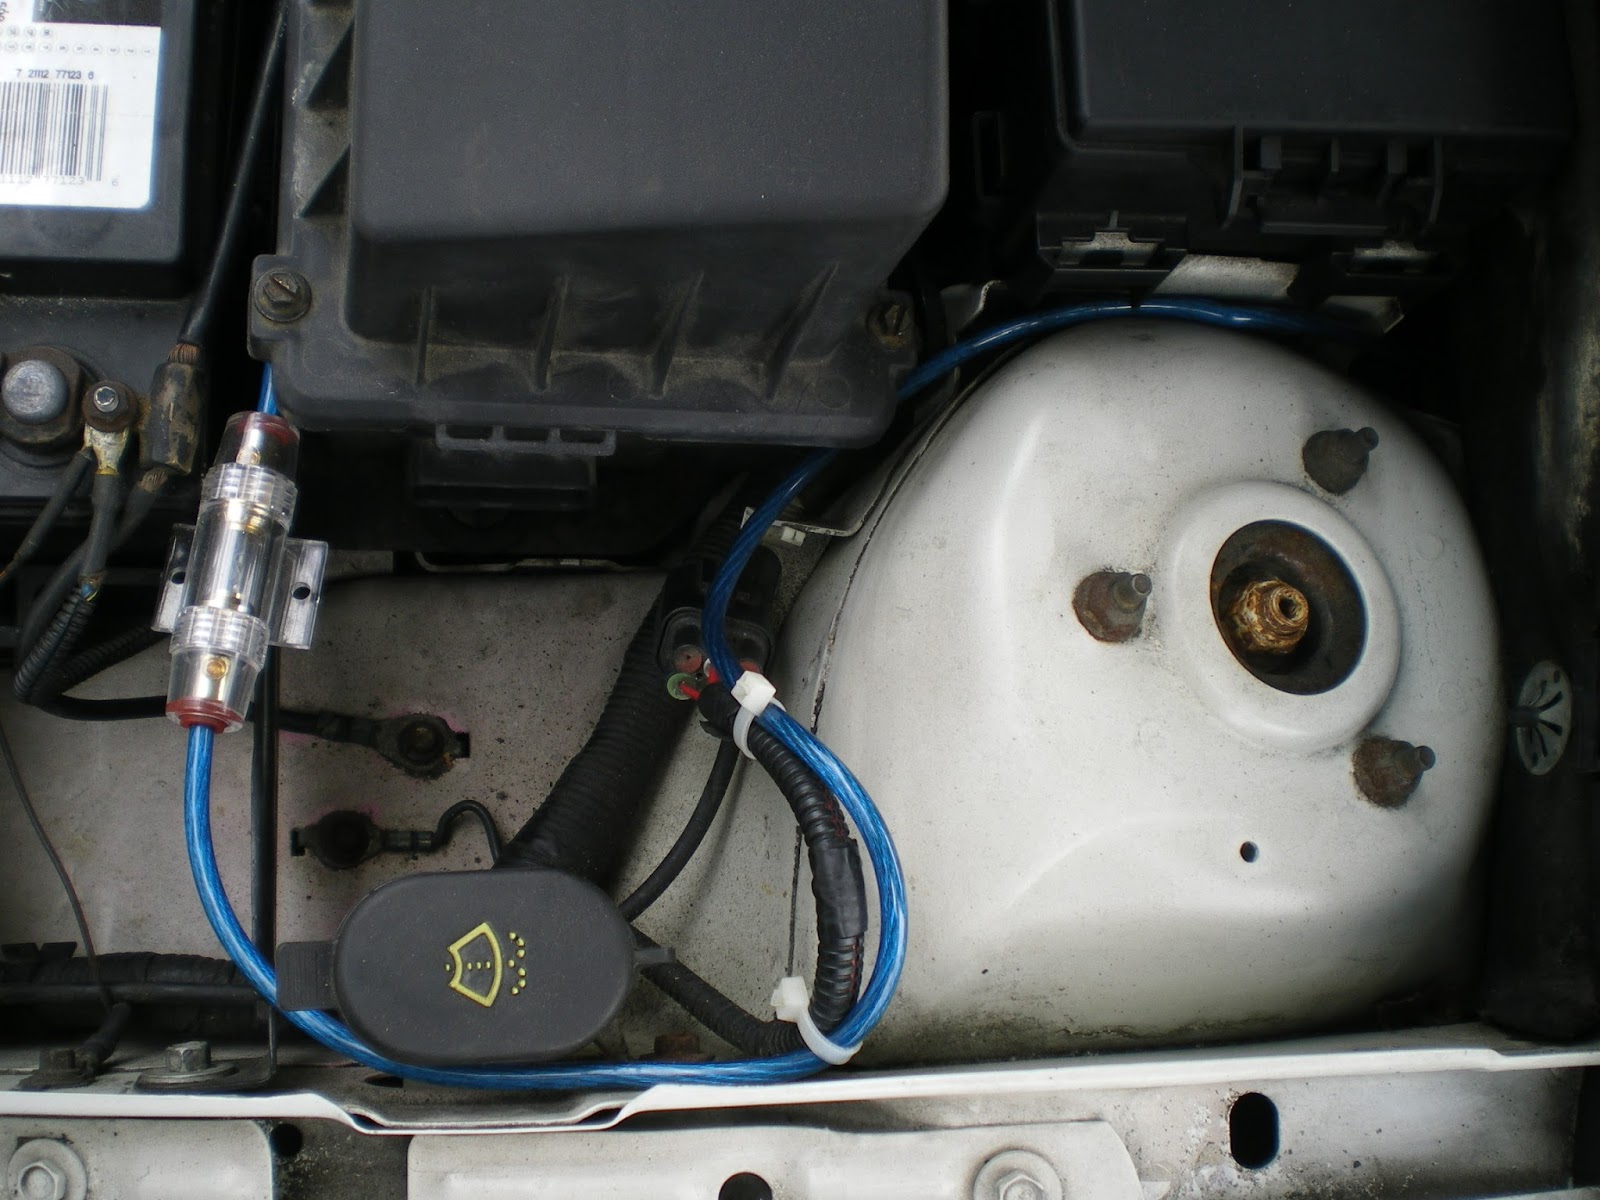
- To layout the amplifier wiring kit, first thing you have to do is disconnect the ground from the battery, to avoid any accidental short. Run the positive cable from the battery to the inside of the car, but do not connect it to the positive terminal of the battery. I have an automatic 02 Ford Focus, so I drilled a hole where the clutch assembly should have gone to just about a little bigger than the size of my amplifier wiring kit to be able to fit it together with the rubber grommet on. The idea here is to make it look as neat as possible.

- I used zip ties to tie together my positive cable, accessory wiring, and RCA cable together to existing wiring on the underside of my dash board. Now this is where the wire worm comes in handy, I have removed the panels below the A-pillar, front and rear stepboards on the driver side of the car. By inserting the wire worm through the driver seatbelt post, I was able to cut time by half because I didn't have to remove the seatbelt which is or me is hard, and I love shortcuts, just be careful not to yank the wire out as there wires running under that stepboard. Pull it over to the backseat, use the wire worm as before to get it to the trunk space which is easier than the front side. Connect all the wiring to the subbox. and follow proper orientation. Install the amplifier grounding cable close to the amp and box, scratch a paint off of the body where you want to terminate the ground cable to have a really good ground. As soon as you have done terminating all the wiring on the sub box and terminating the ground. it is now time to connect the positive cable to the battery, install the fuse last. Reconnect the ground to the car battery, then install the fuse back to the fuse holder.
- Here are the rest of the pictures for the project.